728x90


com.boot.leaf.dto 패키지를 만들고 LeafDto 클래스 만들어주세요
LeafDto.java
package com.boot.leaf.dto;

public class LeafDto {

	private String subject;
	private int seq;

	public LeafDto() {
	}
	public LeafDto(String subject, int seq) {
		this.subject = subject;
		this.seq = seq;
	}
	public String getSubject() {
		return subject;
	}
	public void setSubject(String subject) {
		this.subject = subject;
	}
	public int getSeq() {
		return seq;
	}
	public void setSeq(int seq) {
		this.seq = seq;
	}
}
index.html
<!DOCTYPE html>
<html>
<head>
<meta charset="UTF-8">
<title>Insert title here</title>
</head>
<body>

	<h1>INDEX</h1>

	<a href="hello">hello</a><br/>
	<a href="util">utility</a><br/>
	<a href="expr">expression</a>

</body>
</html>
a태그 하나 추가해서 expr로 보내겠습니다!
LeafController.java
	@GetMapping("/expr")
	public String expression(Model model) {

		model.addAttribute("name", "Thymeleaf");

		LeafDto dto = new LeafDto("Java", 1);
		model.addAttribute("dto", dto);

		List<LeafDto> list = new ArrayList<>();
		list.add(new LeafDto("DataBase", 2));
		list.add(new LeafDto("UI", 3));
		list.add(new LeafDto("WEB", 4));

		model.addAttribute("list", list);

		return "expression";
	}
컨트롤러에는 위의 메소드를 추가해주세요!

그런다음 expression.html 파일을 만들어줍니다.
<!DOCTYPE html>
<html xmlns:th="thhp://www.thymeleaf.org">
<head>
<meta charset="UTF-8">
<title>Insert title here</title>
</head>
<body>

	<h1>EXPRESSION</h1>

	<p th:text="|Hello, ${name}|">Hello, $name</p>

	<p th:text="${dto.subject}">dto.subject</p>

	<div th:object="${dto}">
		<p th:text="*{subject}">subject</p>
		<p th:text="*{seq}">seq</p>
	</div>

	<table border="1">
		<tr>
			<th>SUBJECT</th>
			<th>SEQ</th>
		</tr>
		<tr th:each="dto:${list}">
			<td th:text="*{dto.subject}">dto.subject</td>
			<td th:text="*{dto.seq}"></td>
		</tr>
	</table>

	<table border="1">
		<tr>
			<th>SUBJECT</th>
		</tr>
		<tr th:each="dto:${list}">
			<td th:object="${dto}">
				<span th:text="*{subject}">subject</span>
				<span th:text="*{seq}">seq</span>
			</td>
		</tr>
	</table>

	<table border="1">
		<tr th:if="${iflist} ne null">
			<td>iflist가 null값이 아니라면</td>
		</tr>
		<tr th:unless="${iflist} ne null">
			<td>iflist가 null값이 아닌게 아니라면 (null값이라면)</td>
		</tr>
	</table>

	<div th:each="num:${#numbers.sequence(1, 3)}">
		<th:block th:switch="${num}">
			<p th:case="1" th:text="|this is ${num}|"></p>
			<p th:case="2" th:text="|second is ${num}|"></p>
			<p th:case="3" th:text="|this is ${num}|"></p>
		</th:block>
	</div>

	<a th:href="@{index.html}">index</a><br/>
	<a th:href="@{index.html}">util</a>

</body>
</html>
<p th:text="|Hello, ${name}|">Hello, $name</p>넘겨받은 name의 값의 앞에 hello를 붙이고 싶다면 ||사이에 hello를 붙이면 됩니다.
<p th:text="${dto.subject}">dto.subject</p>또한 ${dto.subject}라면 dto가 가지고 있는 subject를 사용하겠다는 의미이며 마찬가지고 시작태그와 끝내그 사이의 내용은 덮어지게 되어 출력되지않습니다.
<div th:object="${dto}">
	<p th:text="*{subject}">subject</p>
	<p th:text="*{seq}">seq</p>
</div>
단일 값 말고도 object도 출력할수 있는데요.
th:object에 ${dto}를 출력하고 그 안에서 값을 출력하면됩니다.
다만 해당 값을 *로 쓰였는데요.
*은 프로그래밍에서 여러가지 의미로 쓰입니다.
전부다 라는 의미로 쓰일때도 있고 1개이상이라는 의미로 쓰일때도 있으며 포인터(연결)의 의미로 사용될때도 있습니다.
위의 코드에서는 포인터의 개념으로 사용되었습니다.
<table border="1">
	<tr>
		<th>SUBJECT</th>
		<th>SEQ</th>
	</tr>
	<tr th:each="dto:${list}">
		<td th:text="*{dto.subject}">dto.subject</td>
		<td th:text="*{dto.seq}"></td>
	</tr>
</table>
오브젝트가 여러개일 경우 dto라는 이름으로 list를 받아와서 출력할수 있네요.
<table border="1">
	<tr>
		<th>SUBJECT</th>
	</tr>
	<tr th:each="dto:${list}">
		<td th:object="${dto}">
			<span th:text="*{subject}">subject</span>
			<span th:text="*{seq}">seq</span>
		</td>
	</tr>
</table>
또한 dto를 object로 받아와서 출력하는 방법도 있습니다.
<table border="1">
	<tr th:if="${iflist} ne null">
		<td>iflist가 null값이 아니라면</td>
	</tr>
	<tr th:unless="${iflist} ne null">
		<td>iflist가 numm값이 아닌게 아니라며 (null값이라면)</td>
	</tr>
</table>
조건문 if문입니다.

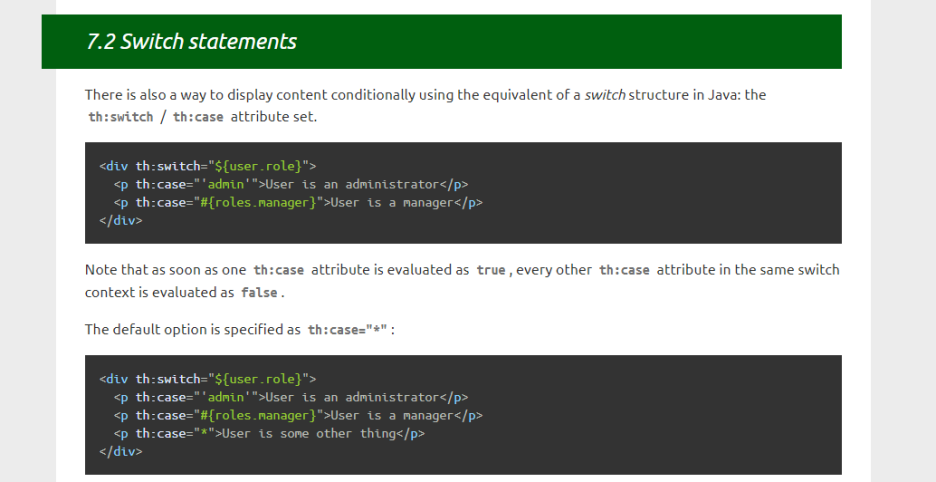
<div th:each="num:${#numbers.sequence(1, 3)}">
	<th:block th:switch="${num}">
		<p th:case="1" th:text="|this is ${num}|"></p>
		<p th:case="2" th:text="|second is ${num}|"></p>
		<p th:case="3" th:text="|this is ${num}|"></p>
	</th:block>
</div>
switch문입니다.
1부터 순차적으로 출력합니다.

<a th:href="@{index.html}">index</a><br/>
<a th:href="@{index.html}">util</a>
@{}는 경로를 지정해줍니다.
728x90
'Java 관련 > SpringBoot' 카테고리의 다른 글
| [SpringBoot] Thymeleaf01 (0) | 2022.04.15 |
|---|---|
| [SpringBoot] 스프링부트에 DB연결하기 (2) | 2022.04.14 |
| [SpringBoot] Spring Boot 기본 설정 (0) | 2022.04.13 |
![[SpringBoot] Thymeleaf02](https://img1.daumcdn.net/thumb/R750x0/?scode=mtistory2&fname=https%3A%2F%2Fblog.kakaocdn.net%2Fdna%2F2mMHX%2FbtrnxlG6nba%2FAAAAAAAAAAAAAAAAAAAAAPsVBDAaJ5xOInEBhX1zTlMyWbIQsCgrO2Enc98v77Pt%2Fimg.png%3Fcredential%3DyqXZFxpELC7KVnFOS48ylbz2pIh7yKj8%26expires%3D1764514799%26allow_ip%3D%26allow_referer%3D%26signature%3Ddrmm%252F9H3kthJzAveWLTedbEtPG4%253D)