[SpringBoot] Spring Boot 기본 설정

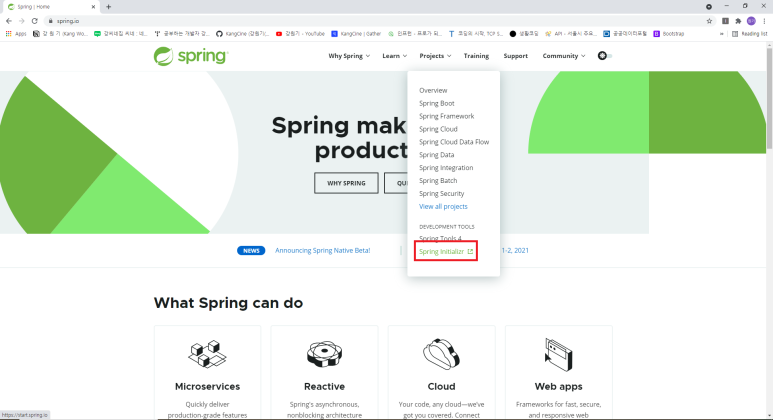
spring.io로 이동해서

스프링 부트는 톰켓이 내장되어있어서 Jar파일이 기본적으로 설정이 되어있다.
내부 톰켓을 안쓰기 위해서는 따로 설정을 하고 War파알로 배포를 해야합니다.
GENERATE버튼을 누르면 demo.zip파일이 다운로드됩니다.

임포트는 Existing Maven Projects로 합니다!
<?xml version="1.0" encoding="UTF-8"?>
<project xmlns="http://maven.apache.org/POM/4.0.0" xmlns:xsi="http://www.w3.org/2001/XMLSchema-instance"
	xsi:schemaLocation="http://maven.apache.org/POM/4.0.0 https://maven.apache.org/xsd/maven-4.0.0.xsd">
	<modelVersion>4.0.0</modelVersion>
	<parent>
		<groupId>org.springframework.boot</groupId>
		<artifactId>spring-boot-starter-parent</artifactId>
		<version>2.4.5</version>
		<relativePath/> <!-- lookup parent from repository -->
	</parent>
	<groupId>com.example</groupId>
	<artifactId>demo</artifactId>
	<version>0.0.1-SNAPSHOT</version>
	<name>demo</name>
	<description>Demo project for Spring Boot</description>
	<properties>
		<java.version>11</java.version>
	</properties>
	<dependencies>
		<dependency>
			<groupId>org.springframework.boot</groupId>
			<artifactId>spring-boot-starter</artifactId>
		</dependency>

		<dependency>
			<groupId>org.springframework.boot</groupId>
			<artifactId>spring-boot-starter-test</artifactId>
			<scope>test</scope>
		</dependency>
	</dependencies>

	<build>
		<plugins>
			<plugin>
				<groupId>org.springframework.boot</groupId>
				<artifactId>spring-boot-maven-plugin</artifactId>
			</plugin>
		</plugins>
	</build>

</project>
pom.xml에 보면 그냥 스프링프레임워크보다 내용이 적어보이지만 디펜던시 하나에 관련내용이 매우 많이 들어있습니다.
(컨트롤 누르고 디펜던시 누르면 해당 디펜던시 안에있는 내용을 보여줍니다)
package com.example.demo;

import org.springframework.boot.SpringApplication;
import org.springframework.boot.autoconfigure.SpringBootApplication;

@SpringBootApplication
public class DemoApplication {

	public static void main(String[] args) {
		SpringApplication.run(DemoApplication.class, args);
	}

}
DemoApplication.java에 들어가면 해당 내용이있는데 @SpringBootApplication 어노테이션이 달려있습니다.
또 보면 src/main/resources에 application.properties가 있는데 이 안에는 web.xml의 내용을 설정합니다.
새로운 프로젝트를 만들어보겠습니다


프로젝트에 그대로 저장을 할예정이기때문에 Use default location을 설정합니다.
아까 봤던 demo랑 설정에는 큰 차이가 없습니다!

해당 화면은 디펜던시를 추가하는 창입니다.
많은 내용이 있지만 Spring Web만 체크하고 넘어갈게요!
체크만해도 자동으로 추가됩니다.

그다음 Finish 눌러주시면 프로젝트가 만들어집니다!

demo에서는 spring-boot-starter였는데 이번에는 web까지 붙어있습니다!

스프링 부트에서 지원하는 디펜던시 들입니다!

프로젝트에서 src/main/resources에 보면 static과 templates라는 폴더도 생겼네요!
*.html관련파일은 static 폴더에 들어가고 템플릿 관련 파일은 templates파일에 들어갑니다
일단 application.properties파일을 열어봅니다
application.properties
# server
server.port=8787

# view
spring.mvc.view.prefix=/WEB-INF/views/
spring.mvc.view.suffix=.jsp

# encoding
server.servlet.encoding.charset=UTF-8
server.servlet.encoding.force=true
server.servlet.encoding.enabled=true
파일을 열어보면 비어있을텐데 이런 내용을 작성해줍니다.

static폴더 안에 index.html파일 하나를 만들겠습니다.
index.html
<!DOCTYPE html>
<html>
<head>
<meta charset="UTF-8">
<title>Insert title here</title>
</head>
<body>

	<h1>Hello, Boot</h1>
	<a href="/index">index</a>

</body>
</html>
StartBoot01Application.java
package com.boot.hello;

import org.springframework.boot.SpringApplication;
import org.springframework.boot.autoconfigure.SpringBootApplication;
import org.springframework.stereotype.Controller;
import org.springframework.web.bind.annotation.GetMapping;

@Controller
@SpringBootApplication
public class StartBoot01Application {

	public static void main(String[] args) {
		SpringApplication.run(StartBoot01Application.class, args);
	}

	@GetMapping("/index")
	public String index() {
		return "index";
	}

}
@Controller 어노테이션을 걸면 SpringBootApplication의 역할과 Controller의 역할을 같이 해줍니다.
이제 실행 한번 해볼까요??
프로젝트 우클릭 - Run As - 9. Spring Boot App 눌르면 실행됩니다!

http://localhost:8787/index 를 브라우저에서 요청해보면

404에러가 발생합니다.
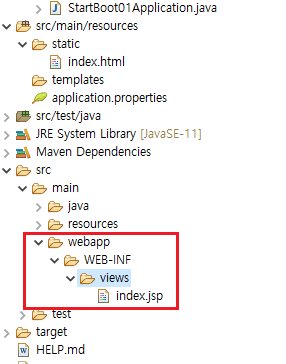
에러를 해결하기 위해 src/main아래에 webapp/WEB-INF/views에 index.jsp를 만듭니다.
pom.xmp에 톰켓 디펜던시를 추가하겠습니다.
tomcat-embed-jasper

버전을 안적어도 스프링부트가 알아서 잡아줍니다!

이제 다시 실행시켜보면 잘됩니다!